
SAFETY / CAR CARE
How to Change Flat Tyre
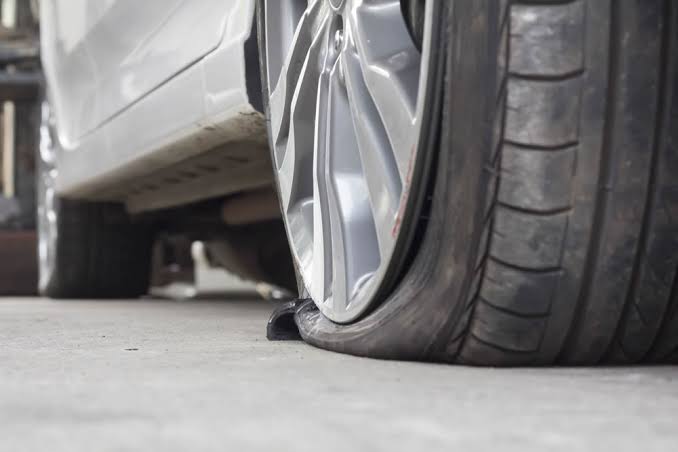
Some drivers are afraid of having to change a flat, punctured or damaged wheel. This is a problem because sometimes you don’t know where to put your hands. Here is a step by step guide on how to replace a tire!
FIRST PHASE: PREPARATION
• Put on the reflective safety vest and position the triangle 50 meters (corresponding to approximately 70 steps) from the vehicle. Make sure you have this equipment on board, as the penalty in case of control, if the vehicle does not have it, is about 75 euros.
• Look for a flat, safe space to park and replace the wheel safely. The surface must be solid and even to prevent the car from moving accidentally. Try to stop as far as possible from the flow of vehicles and immediately light the four arrows. If possible, avoid stopping on a slope or on soft ground.
• Engage the handbrake and leave the gearbox in first or reverse. For automatic vehicles, leave the gear in “parking” mode.
• Place a heavy object, such as a stone, in front of the front and rear wheels of the car.
• Take the jack and place it next to the tire you are about to change. The jack (or hydraulic jack) must embrace the side skirt, a metal part of the car frame specially designed to receive it. The underside, in many cars, is made of plastic, and if you don’t place the jack in the right place, the plastic will break as soon as the car is lifted. If it is not clear where to mount the jack, consult the car manual.
• On most modern cars there is a small mark (usually a downward pointing arrow pointing down) just behind the front wheel or in front of the rear wheel, indicating exactly where the jack should be mounted.
• On old cars or vans, the jack should be positioned at one of the chassis axles, which are located just behind the front wheel or in front of the rear wheel.
• Raise the jack just enough to support the vehicle, but do not lift it off the ground. When the vehicle appears to be well supported, make sure the jack is perpendicular to the ground.
SECOND PHASE: REMOVAL OF THE GROUND WHEEL
• Remove the wheel cap (also called hub cap) and loosen the bolts by turning the appropriate wrench counterclockwise. Initially the bolts should not be loosened completely, but only left free. In this phase, the tire must be left in contact with the ground, in order to easily turn the screws without the wheel moving. Loosening the screws can take a lot of force. If all your attempts fail, throw your body weight against the wheel wrench or step onto it (but first of all, be careful to turn the screws counterclockwise). However, be careful, as applying a lot of force there is a risk that the screws will strip.
• Operate the jack to raise the tire a little higher. The car must be at a distance from the ground to allow for wheel removal. While the car is suspended, check that it is stable: if it shows signs of instability, lower the jack and correct the problem before suspending the vehicle again. Having a spare smaller jack in the trunk is always a good idea, as the jack can fail while changing tires. Using both tools at the same time ensures greater safety in case of failure of the larger jack.
• Remove the nuts completely. Keep turning them counterclockwise until they are completely loosened; finally, remove them. Although rare, in some vehicles – such as older Chevrolet and Chrysler models for example – the thread of the wheel mounting bolts is reversed.
• Remove the wheel and place it under the vehicle – if the jack fails, it will cushion the fall, reducing the risk of an accident. If the jack is resting on a flat, solid surface, you shouldn’t have any problems.
• It can be difficult to remove the tire due to rust. In this case, you can hit the back of the tire with a rubber mallet.
THIRD AND LAST PHASE: ASSEMBLE THE NEW WHEEL
• Place the spare wheel on the hub. Leave the spare wheel rim well aligned with the nut housings and screw them back on.
• Caution : Install the tire on the correct side, making sure the tube valve is facing outward and not toward the vehicle.
• Tighten the nuts by hand, tightening them as much as possible and then continue with the wrench, following a star pattern. To secure the tire correctly, do not tighten the nuts all at once. Instead, start with one screw, then tighten the opposite one, and so on. Avoid forcing the wheel wrench until the jack moves. The tightening of the nuts should only be completed when the car is back on the ground.
• When lowering the truck, do not let the weight rest on the new tire. Before doing this, tighten the screws as much as possible.
• Finish lowering the carriage and remove the jack. Finish tightening the screws and reposition the cap.
• Put the old wheel in the trunk.
-

 AVIATION6 years ago
Photo News: Air Peace commence flight operations to South Africa
-

 Car News6 years ago
Polestar is recalls over 2000 electric cars due to software bug
-

 Technology6 years ago
Common mistakes in CO₂ emissions calculations
-

 RAIL5 years ago
36 Killed in Pakistan Train Accident
-

 Business6 years ago
2016 Volvo XC60 review and specifications
-

 Reviews6 years ago
2021 Audi A6 Specifications and Review
-
 SAFETY / CAR CARE6 years ago
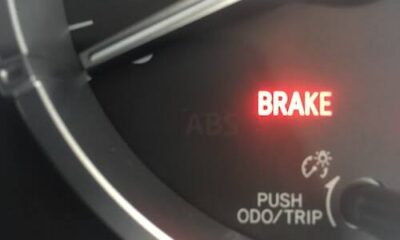
Handbrake warning light; what it means and what to do
-

 NEWS5 years ago
FG To Spend ₦900 Billion On Fuel Subsidy In 2022